
Acrylic (PMMA) is a marvel of modern manufacturing. Its crystal-clear transparency, excellent weather resistance, and good strength make it a top choice for a vast range of applications. From custom LED light guides and precision optical lenses to durable nameplates and badges and architectural display prototypes, acrylic delivers a stunning visual finish.
However, its beauty is also its machining challenge. Anyone who has tried to CNC machine acrylic has likely encountered two frustrating issues: stress whitening and edge chipping. These defects can turn a potentially perfect part into a rejected scrap, increasing costs and delaying projects.
This comprehensive guide delves into the root causes of these problems and provides actionable strategies to achieve optically clear, sharp, and professional-grade acrylic parts.
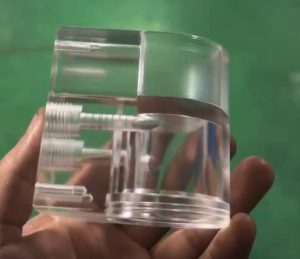
Understanding the Enemy: Stress Whitening vs. Chipping
First, it’s crucial to distinguish between these two common defects:
- Stress Whitening (Crazing): This appears as a milky white, cloudy haze on the machined surface. It is not merely a surface scratch but is caused by internal micro-cracks due to excessive heat and/or mechanical stress during cutting. The crazing scatters light, destroying the material’s transparency.
- Edge Chipping (Spalling): This is the physical breaking away of material along the cut edge, leaving a rough, fractured appearance. It typically occurs when the cutting force exceeds the material’s cohesive strength, often due to a dull tool or an improper cut direction.
Both issues stem from poor machining practices, but they can be systematically eliminated.
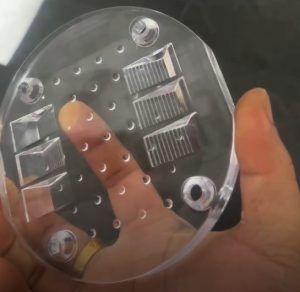
The Golden Rule: Sharpness, Sharpness, Sharpness
The single most important factor in machining acrylic is using razor-sharp tools. A dull tool doesn’t cut; it hammers, tears, and heats the plastic, guaranteeing stress whitening and chipping.
- Tool Material: Solid carbide tools are highly recommended. They hold a sharper edge far longer than high-speed steel (HSS).
- Geometry:
- High Helix Angle (45°+): This helps to lift chips efficiently out of the cut, preventing them from re-welding to the workpiece and causing heat buildup.
- High Number of Flutes (2 or 3): More flutes provide a better surface finish but ensure sufficient chip clearance. For roughing, a 2-flute end mill is often ideal.
- Highly Polished Flutes: A mirror finish on the flutes reduces friction and gumming, which is critical for achieving a glass-like surface on acrylic display covers and lenses for lighting fixtures.
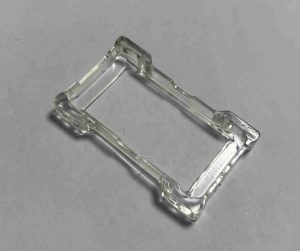
Optimizing Your CNC Parameters for a Perfect Cut
With a sharp tool in hand, the next step is to dial in your machine parameters.
1. Feeds and Speeds: The Balancing Act
- High Surface Speed (RPM): Run the spindle fast. A high RPM ensures the tool is slicing through the material rather than rubbing against it. For a ¼” (6mm) tool, this could mean 18,000-24,000 RPM.
- Aggressive Feed Rate: Do not feed too slowly. A slow feed rate causes the tool to rub and generate excessive heat. A higher feed rate ensures the tool is consistently engaged in clean shearing, which produces clean chips and carries heat away. The goal is a continuous, crisp chip, not dust or melted globs.
- Light Depth of Cut (DOC): Take lighter depths of cut, especially for finishing passes. A DOC of 10-20% of the tool diameter is a good starting point. This minimizes the cutting force and reduces stress on the part and tool.
2. Climb Milling vs. Conventional Milling
- Always use Climb Milling (Down Milling). In climb milling, the tooth’s rotation direction matches the feed direction. This allows the sharp edge to cleanly shear the material at the top of the cut, producing a superior surface finish and reducing the tendency to lift the workpiece.
- Avoid Conventional Milling (Up Milling). This method forces the tool to rub and work-harden the surface before the cut is made, significantly increasing the risk of stress whitening and a poor finish.
Advanced Techniques for Critical Features and Finishes
For parts requiring the absolute best aesthetics, consider these advanced strategies.
1. Achieving “Invisible” Engraving and Lettering
For engraved serial plates or branded control panel overlays, stress whitening in the engraved text is a common problem.
- Solution: Use a specialized “O” flute or “V” bit engraving tool. These tools are designed for plastics, with a single, sharp point that shears the material cleanly rather than plowing through it. Couple this with high RPM and a slow, consistent feed rate for the engraving path.
2. Drilling Clean Holes
A standard drill bit can cause massive breakout (chipping) on the exit side.
- Solution:
- Use a Brad-Point Drill Bit or a PCB Drill Bit. These are incredibly sharp and have a central point that scores the material before the lips engage, ensuring a clean entry and exit hole.
- Always back the acrylic with a sacrificial spoil board to support the exit side.
3. The Power of Coolant (or Lack Thereof)
- Compressed Air is King: The best coolant for acrylic is a strong, consistent stream of compressed air. It serves three purposes:
- Cools the cut: Prevents heat buildup.
- Clears chips: Stops chips from re-welding to the part or tool.
- Prevents gumming: Keeps the flutes clean.
- Avoid Liquid Coolants: Most liquid coolants can attack acrylic, causing cracking or cloudiness. If you must use a liquid, ensure it is compatible with plastics, but air is almost always the superior choice.
Post-Processing: The Final Touch
Even with perfect machining, a final post-processing step can elevate the part to perfection, especially for consumer electronics prototype housings or museum display artifacts.
- Flame Polishing: For edges, a quick pass with a hydrogen torch flame can melt the microscopic surface layer, making it perfectly smooth and optically clear again. This requires practice to avoid melting the entire feature.
- Vapor Polishing: For complex geometries, exposing the part to solvent vapors (like acetone) in a controlled chamber can dissolve the surface layer, removing all tool marks and stress whitening to create a perfect, water-clear finish.
Partner with a Prototype Shop That Knows Plastics
Machining acrylic to a flawless standard requires more than just a CNC machine; it requires a deep understanding of material behavior, specialized tooling, and meticulous process control.
At Lenchor, we have honed our expertise in machining a wide range of plastics, from delicate acrylics to robust PEEK. We understand that a part like a custom medical device clear housing or an optical light guide for automotive cannot compromise on clarity or precision.
We don’t just run your file; we analyze the geometry, recommend the optimal tooling strategy, and execute with the parameters that guarantee a perfect result the first time.
Tired of acrylic parts with stress cracks and chipped edges? Let’s make clarity a guarantee. Upload your CAD file today for a free Design for Manufacturability (DFM) analysis and instant quote.